Takeout Fakeout: Spicy Kung Pao Chicken

Whenever my Hubs and I go out to PF Changs, there’s 2 things we can’t go without having. Their delicious and amazing Lettuce Wraps, and their Kung Pao Chicken. Some nights, however, we like to sit on our couch and watch Supernatural (Dean Winchester, anyone?) in our comfiest comfies…..so here we are…..in our comfies…..and this is my version of Kung Pao Chicken. I (per usual) have subbed in CauliRice in my finished product picture, but my fellas are having white rice instead. We like ours pretty spicy, so this is our base level of heat. Feel free to increase or decrease the spice hit with adding more or less chill/Sambal.

Update: I forgot the damn Cauliflower, so PSYCH…...no CauliRice.

Ingredients

Mise en Place DUNZO!

Mise en Place DUNZO!


Marinade:

2 lbs. boneless/skinless chicken thighs, diced into bite size pieces

2 TBSP rice wine vinegar

2 TBSP soy sauce

2 egg whites

1 tsp sugar

1 tsp cornstarch

Step 1—Mix vinegar, soy sauce, egg whites, sugar and cornstarch together well. Toss chicken with mixture to coat. Place into fridge to chill.

Sauce:

1/2 c. chicken stock

2 TBSP Sambal

2 cloves garlic, minced finely

2 tsp freshly grated ginger

3 TBSP soy sauce

1.5 TBSP rice wine vinegar

1 tsp. sesame oil

1 TBSP sugar

Step 2—Mix all ingredients together and set aside.

Goods:

Avocado oil for stir frying

2 tsp. crushed red pepper flakes/dry chiles

1 c. dry roasted peanuts

3 scallions, chopped

1 red bell pepper, chopped

3 dried chilies (I used Arbol)

Instructions:

Step 3—Once mise en place is dunzo, heat oil in a large skillet or wok to medium and add peanuts….stir fry for 2 minutes or until peanuts are golden. Be careful to not let them burn……iz pew. Remove and set aside on plate.

Step 4— Add another tbsp or so of oil into skillet and bring heat to medium-high. Scoop chicken out of marinade with a slotted spoon, allowing excess to run off and begin to stir fry. Once you have cooked all of your chicken, add peanuts back into pan and add bell pepper in to stir fry.

Step 5—Reduce heat to medium-low, and stir in the sauce. Sauce will thicken as it cooks, and once it is thickened, toss in scallion, and it is ready to serve over white or brown rice, or even CauliRice…….if you don’t forget it at the store like I did today. Ugh. SOOOOOOO worth the carbs!

B00BEE39-BCF4-46B5-9714-236CAA9E21A9.jpg


Buttermilk Biscuits

Buttermilk Biscuits


043A2BA6-C037-49AA-A691-3E615435FBA9.jpg

It is important to make certain that you handle the dough as little as possible with your hands, as it helps to keep the butter cold and that means flaky biscuits. I use my trusty wooden mixing spoon to mix everything right up until I turn it out of the bowl and onto the floured surface for rolling and cutting.

Ingredients:

2 c. AP flour

2 TBSP Baking Powder

1.5 tsp. salt

1 3/4 c. Buttermilk *plus 2 tbsp reserved for brushing the tops of the biscuits

1 stick butter

How To:

Step 1—Sift together in a large mixing bowl:

2 c. AP flour

2 TBSP Baking Powder

1.5 tsp. salt

Step 2—Grate 1 stick COLD butter with a CHILLED box grater, and add into flour mixture. Stir together to distribute shreds of butter evenly into flour mixture.


Chill your box grater and butter to reduce handling and keep it colder longer….which means flaky layers in your biscuits. Just pop them into the freezer for about 20 minutes to get cold!

Chill your box grater and butter to reduce handling and keep it colder longer….which means flaky layers in your biscuits. Just pop them into the freezer for about 20 minutes to get cold!

Step 3—Pour in CHILLED buttermilk and stir until just mixed. Turn out onto floured countertop and grab your rolling pin.

Step 4—Roll dough to about an inch thickness, then fold it into thirds and roll again. Repeat 3 times to create the layer in the dough.

Step 5—Cut out into desired size/shape and place on a baking sheet lined with parchment/Silpat. Brush the tops of biscuits with reserved buttermilk. Bake for about 10 minutes, depending on oven temps varying. You are looking for a beautiful rise, and just golden tops.


Fluffy, Buttery, Tasty lil’ beauts!

Fluffy, Buttery, Tasty lil’ beauts!

Step 6—DEVOUR THESE FLUFFY LITTLE DELIGHTS! They are great with butter and jam, alongside fried chicken, or drenched in country gravy.

Source: http://www.whatcheescooking.com

Snowy Days and Wonton Soup

*sigh*…….Well, it’s snowing again in Spokane because of course it is…..you know, because it’s February and all. I say that with a shitload of sarcasm, and as someone who REALLY does love the snow, albeit I prefer to watch it come down from inside with a hot cup of tea or good glass of red wine. In December. Around Christmas. It seems WAAAAY less fair when just yesterday I could see grass in my yard and it felt like spring was within our grasp. Lies. All lies. ANYWAY, its chilly outside and snowing, so I decided what sounded great for dinner was a big bowl of loaded wonton soup. Rich and complex ginger, garlic and lemongrass infused chicken stock…..umami packed shiitake mushrooms….tender AND crisp baby bok choy….and super delicious, packed to the gills, gingery and tasty pork wontons. I can almost taste them now…bobbing around all yummy and shit in that RIDICULOUSLY bomb chicken soup stock. YUM.

One of my favorite things about this particular soup recipe (which I’ve included below), is the fact that I can put it into the crockpot and let it simmer away all day. I’m busy and usually have a million things ( mostly food ideas haha!) running through my mind, so it’s nice to be able to still make a beautiful soup stock while I take care of business. I’ve made this basic soup for the past few years, as I find it to be absolutely delicious….HOWEVER, I like to fancy my food up and nowadays I add the aforementioned Shiitakes, Baby Bok Choy, and crisp Water Chestnuts to add a bit more nutrition to the bowl and they’re DELICIOUS. Hell, sometimes I will even toss in paper-thin sliced shallot and Sambal. I’m a pretty wild and crazy chick like that. Straight wildin’ out.

My First Bowl of Homemade Wonton Soup……simple, but really damn tasty.

My First Bowl of Homemade Wonton Soup……simple, but really damn tasty.

Ingredients:

*Will make 3 servings….sometimes 2. Depends on how hungry we are….plus we just really like wonton soup.*

Soup Stock:

3 Qt. good quality chicken stock

2-2” pieces of ginger root, peeled and sliced in half lengthwise

3 cloves garlic, rough smashed and peeled

3 scallions, ends trimmed and sliced in half, lengthwise

1 medium stalk lemongrass, bruised well

1/4 C. Tamari or good quality soy sauce

Salt and Pepper to taste

fullsizeoutput_4604.jpg


Step 1—Put all above ingredients into your trusty crockpot. Set to low. Allow to cook away and make your house smell amazing for AT LEAST 4-6 hours. Think of it like a tea….it takes time to steep those flavors into the soup, and it only gets more scrumdiddle the longer it goes.

Step 2—Strain stock into large-ish pot to remove all the herbs/aromatics prior to adding in wontons. Allow to come to a slow simmer on your favorite burner (because we all have one…real talk) while you fold the wontons.

Wonton Filling:

fullsizeoutput_45ef.jpg

1 package wonton wrappers

1 lb. ground pork

2 TBSP each, minced finely:

fresh ginger root

scallion

garlic

lemongrass

1.5 TBSP Tamari

2 tsp. Fish sauce

1.5 tbsp. Gochujang

1 tsp. salt and pepper

Step 1—Mix all filling ingredients together in medium bowl, until incorporated well.

Step 2—Lay out wonton wrappers in batches of 4, and make sure to keep them covered with a damp pair towel so they don’t dry out. Place 1 TBSP of pork mixture into center of each wonton wrapper.

Step 3—Wet two sides of wonton wrapper with water with fingertips, and fold across on the diagonal. Seal edges. Should vaguely resemble photo below:


C3B66010-E026-4616-BD93-8D889DC1EC96.jpg

Step 4—Fold 2 bottom corners across, like you would fold your arms….one under the other. Continue until filling is gone.

UuYhMZwVRkueQDeHzTMuug.jpg

Step 5—Add wontons into stock on stovetop, and allow to gently simmer to cook the pork filling through-usually for about 15-20 minutes.

As I mentioned above, I add whatever I like into it, but generally it’s scallion, Sriracha or Sambal, and water chestnuts, unless I want to be pinky out bougie—like tonight. I guess this will make up for the dregs of winter here in Spokane Valley!

0B0C0AAF-D445-44CC-92EE-D91B9F58C354.jpg


Love and Jerk Chicken

From the minute I laid my eyes on my hubster, I knew he was different from the guys I had dated in the past. He seemed genuinely nice and interested in me....in what I had to say, what my likes and interests were, what I was passionate about....he was just a really amazing guy. Easy to laugh and to smile, and loves to make me laugh. He is pretty ridiculous, truth be told.....but he is mine, all mine and I would have it no other way. He was so adorable and nervous when he proposed and soooo patient throughout the wedding planning and SOOOOO happy when it was all over and we could go to Jamaica to unwind from the stressful (and intoxicating) wedding week and just be with each other and be married. We stayed at a Sandals resort on the far side of the island, nice and secluded, with a swim-up bar right outside our beachfront room and tons of restaurants on the resort to try out. I couldn't wait to enjoy delicious seafood and fish right on the island and to drink fruity drinks and swim in the warm water, and hang out with my brand new husband.

Our first day on the island, we hit the beach and swam forever in the crystal clear blue water....enjoyed the sunshine and the hospitality of the bartenders at the swim-up bar....got tan and took a nap....and then we got up to head to dinner at the seafood restaurant on the resort. Neptune's, I believe it was called. It took awhile before we got a table, then it took awhile for us to get a drink......then it took awhile for our food to come, but we were CERTAIN it would all be worth it and so so tasty. *sigh*.....it was not. I don' think we even ate it....we went instead to get a drink. (Shake it off, Kim....shake it off.....) So, the next morning at breakfast (which was really good) we decided that afternoon after our mid-morning swim/buzz/pool volleyball session to explore down the beach. And do you know what we found, guys?? Through all of the little huts and cabanas on the beach, there it was...............the jerk chicken shack. Jerk. Chicken....In Jamaica. OH MY GOD. SO SO SO GOOD. This was a game changer for us for the rest of our trip...between the jerk chicken and the meat handpies we discovered the next day, we developed our honeymoon diet/routine.

In the AM, we would head to breakfast at the MASSIVE buffet to get a base going for what would inevitably end up being a STELLAR day at the pool/cabana/swim-up bar. Soaking up rays and rum soaked concoctions made for us by the always smiling and hospitable bar staff, then walking down to the handpie stand or to get what became my hubster's favorite, jerk chicken. Then it wax back to the room or the cabana to relax before swimming and rumming it up some more for the remainder of the afternoon. Jerk Chicken became central to our days at our little slice of paradise, and my hubster has missed it ever since. Until tonight.


For tonight's dinner, I decided that he shouldn't have to be without the deliciousness that is jerk chicken....so after some research as to all the spices used, I whipped up a boss batch of marinade and rubbed it all up on some chicken leg quarters and let them get super happy overnight. After all that happiness occurred, I slow roasted them for an hour or so in the oven at 325.....then finished them on the grill with some generous basting of the leftover jerk marinade that I hadn't used during the marination of the chicken. Chicken alone does not a meal make, so I made some amazing rice and beans to go with....made with homemade chicken stock I had in the freezer, a generous sprinkling of my jerk chicken rub, some finely chopped scallions and about a quarter cup of the chicken drippings. OH. And let us not forget the mango jalapeño salsa up on top. It's a spicy and sweet trip down memory lane for my hubster and I............even if it is just dinner for tonight!


Chipotle Ranch Chicken Tacos

I know you are all mightily aware of it, but it should be said that I LOVE TACOS.  Unapologetically, and completely. There are so many ways to enjoy them, and I have 5 or 6 on rotation for Taco Tuesday....including these yummy delights! The chicken couldn't be easier to make, so it is super convenient to make during football season, when my son has practice 2-3 nights a week....or even if you just have a full afternoon ahead of you. The spiciness of the cayenne, chili powder, and chipotle play really well off of the herby-buttermilky-funkiness of the Ranch seasoning. And the best thing about these tacos? EVERYONE LOVES THEM. I serve them (with both corn tortillas AND flour tortillas....because, our kids don't both share our love of corn tortillas.) with all kinds of toppings, and although I treated them Cali-style tonight, with crumbled crispy bacon and avocado......I also put out black beans, cilantro and onion, diced tomato, and crumbled Cotija. They really are a family pleaser, because the chicken has a tiny bit of spice by itself but not so much of a spice that the kids can't eat and enjoy them....and with a plethora of toppings to choose from, everyone can customize theirs. 

The Pollo:

  • 1-2 lbs of boneless skinless chicken thighs
  • 2 packages of ranch dressing mix
  • 1 chipotle in adobo, diced up really well
  • 1 cup chicken stock
  • 2 tsp taco seasoning
  • 1 tsp black pepper

Now, pay attention, because this is important.........you dump them all in your crock pot. I know....complicated.  I turn on my crock pot. I set it to high for about 4 hours. BOOM. Now, I like to shred the chicken and then sear it off with some of the resulting stock from crock pot until there is a crispy sear of concentrated deliciousness and serve. Taco Tuesday made easy!!


Risotto Goodness!

Oh. My. Goodness. Risotto is an absolute "Top 5 Favorite Naughty Food" list staple. It is creamy, starchy, and a completely blank culinary canvas to put whatever flavors you like into it. I have experimented with a few so far.....lemon herb roasted chicken with a smidge of goat cheese worked into it at the end (suuuper yum).....slow braised oxtail with my homemade beef bone stock and really good parmigiano reggiano, a splash of heavy cream and fresh cracked pepper.....and this mushroom and asparagus risotto was my latest idea.


The rundown: Asparagus sliced thinly on the bias, sliced Cremini mushrooms, finely diced shallot, and garlic. Not a thing wrong with what's going on here, y'all....Yum!

The rundown: Asparagus sliced thinly on the bias, sliced Cremini mushrooms, finely diced shallot, and garlic. Not a thing wrong with what's going on here, y'all....Yum!

Risotto is made with Arborio rice, which is a short grain and starchy rice that when cooked down slowly with stock and aromatics make a delicious sort of savory and creamy rice porridge that is heavenly and really one of my favorite things to have anytime, anywhere, anyway I can get it!

The Basics:

  1. Garlic and Shallot (or Onion). I used 2 cloves garlic, smashed and chopped with salt into a paste and a small shallot diced. You don't want to caramelize the shallot and garlic, just saute them in equal parts (1.5 tbsp-ish) buttuh and EVOO over medium low until shallots are almost transparent.

  2. Arborio Rice. I needed 1.5 cups dry for 4 servings. This goes into the saute pan once shallots and garlic are sauteed to above specs.

  3. Wine. I usually use whatever I have on hand, and I have found that white will not cause any funky color at the end. (Although what isn't better with the addition of some good Cab Sav?!) I used Chardonnay here, around 1/2 cup, in after the Arborio has had time to toast a bit.

  4. Stock. This makes a difference in the finished product, and if you take the time to make your own (I do) it allows you the opportunity to impart that much more richness and flavor into your finished risotto. Seafood, Turkey, Chicken, or Beef.....the sky is the limit.....but you'll need approximately 4.5-5 cups....and it needs to be warm. Once the wine has had a few minutes to cook out the alcohol, begin adding your stock into the saute pan. I add about 2 ladelfuls at a time, and start the stirring......have I mentioned it's pretty necessary? The rice needs to cook to a nice porridgy/puddingy kind of consistency, and the texture of the rice should be just past al dente.

  5. Cheese. I have to insist you use good cheese.....not JUST in risotto, but IN LIFE. I used 1/2 cup-ish once the risotto has reached the aforementioned porridgy/puddingy/just past al dente texture. Taste and season your food here....before you serve it to your friends and family!

  6. Love and Patience. Risotto is one of those dishes that you have to babysit. Adding ladleful after ladleful of stock and stirring patiently. It takes awhile to cook down the rice. Like 45 minutes of ladling and stirring.....stirring and ladling. It is a process borne of respect and love for the product, and so worth the amazing finished product!

  7. Enjoy! Risotto is a super diverse starch option that is really a HUGE upgrade from potatoes, and every time you make it, it will get better and better. Practice makes perfect, so get to practicing!


Zee French Onion

Yet another food love affair! French Onion Soup is one of those simple yet tremendously tasty dishes that HAS TO BE on your soup rotation list. Imagine with me, if you will.......rich, salty and beefy stock, perfectly sweet caramelized onions, delicious baguette toasted to perfection, all topped with oooey and gooey melty and broiled to perfection cheese. Sounds like a little slice of yum, am I right???

I figured, since I YEARN for it, I should learn to make it. There are extra steps, but it could certainly be simplified by buying beef stock vs. making your own. All of the other steps are not terribly time consuming. Caramelizing onions, slicing store bought baguette and toasting it under your oven broiler, slapping some cheese (I used a nice smoked Provolone....SO SO yum) on top and broiling it to perfection. Easy peasy lemon squeezy. Making your own stock allows you to control the flavors imparted into the base of the soup, such as the herbs used, the mirepoix, type of stock bone used, etc. I make and freeze off all my stocks in batches so that things like a bowl of french onion deliciousness isn't too difficult to have on a random Tuesday for lunch....like I did today.


The Rundown:

1. Caramelized onions are key to a well rounded bowl of FRON. It lends a sweet component to the soup to balance out the saltiness of the soup stock. I like a sweet onion, slivered. 2 tbsp buttuh and a pinch of sea salt. Then you just let them go medium low in a saute pan and work them every so often to allow carmelization and NOT char to occur. Once they are a deep golden brown and transparent your job is done. Remove these puppies from the heat, yo.

2. Let's talk croutons. I like a nice baguette, if you can find them made with sourdough, it gives the bite a nice sour note. Anyway, I slice it on the bias, about 1/2" thick, and toss them on a sheet pan and into my oven with the broiler set at 350 so I can not worry about them burning super quick.

3. CHEEEEEEEEESE. I love Emmenthaler, and smoked provolone. They are melty and delicious. BEWARE-there is such a thing as to much cheese. I have unfortunately made this mistake....now you don't have to!

4. The soup stock. This is a crucial thing (for me, at least) to have done right. I choose to make my own beef stock, but if you want instant satisfaction (which is why I make it ahead and freeze it off) there are great store bought stocks available that you can "soup" up....see what I did there? Homemade is just richer and more flavorful, IMHO.

Assembly:

1. In an oven proof crock/bowl/preferred vessel, put about 2/3 cup of your caramelized onions.

2. Ladle enough hot stock in to come to about 1/2" below lip of vessel.

3. Place 1-2 croutons on top.

4. Place 1-2 slices of cheese of choice on top of croutons.

5. Broil at 375 until a touch of golden brown is evident on the cheese.

6. ENJOY. This is not an option. It is going to be suuuuper hot, so let it cool a bit, but don't wait too long...you won't be able to enjoy the oooey goooey goodness of that cheese.

The afforementioned ooooey gooooey cheesy goodness!

The afforementioned ooooey gooooey cheesy goodness!


Slow Braised Short Ribs and Cheese Grits

Food Porn for your soul. That is honestly the only way I know how to describe this dish. It is a labor of love and you can TASTE it....super indulgent and rich, and so so comforting on a cold night. I grew up eating Cream Of Wheat with butter and maple syrup, but had never had savory grits until last year. (And yes, I know that grits are corn, and Cream O' Wheat is farina, or wheat.) I never even knew what I was missing out on! You throw a little really good sharp cheese and heavy cream into those puppies....some herbage....a little cracked black pepper, and you are in for a delicious treat. Grits have recently enjoyed a resurgence in popularity, I assume thanks to chefs and cooking shows refreshing in peoples minds how versatile and fantastic they are as an alternative from potatoes for slow braised meats, and perfectly seared seafood and veggies. I don't care how they made it happen, I am just super happy it did!

The first time I had savory grits, it was at a local FANTASTIC restaurant, Casper Fry. They are part of the fabulous gentrification of a district here known as the Perry District...in addition to a local brewery, and many other locally owned and operated restaurants and shops. Perry District even has a REALLY neat Thursday market in the spring and summer where you can purchase local dairy, produce and other goodies.....perfect neighborhood for it! Casper Fry is a wonderful locally owned and operated restaurant featuring a Josper charcoal oven/grill hybrid, which is used in cooking/grilling a majority of their proteins, dishes, etc. It imparts a huge amount of flavor into the food. Casper Fry also has a phenomenal bar program, in which they use a variety of aromatic bitters to bring their vintage cocktails to life.....truth be told, they had me at cocktails....haha! Their menu is low country cuisine, but served absolutely elevated and refined...MASSIVE short ribs, like Flintstone-status big.....buttermilk fried chicken and biscuits, shrimp and grits with a delicious tomato broth and seasonal veggies....I could go on and on. But I digress. The grits. mmmmyes.

Grits have been a staple for many decades in many southern households, and they are definitely having a culinary moment. Made from ground corn kernels, and when cooked in a traditional way, they are a porridge that takes on any flavors you impart extremely well....and make a pillowy and delicious bed for anything. I usually like to braise beautiful beef short ribs in red wine, beef stock, herbs and mirepoix..........

then reduce a little bit of the braising liquid for a lovely pan sauce to spoon over the whole thang............unbelievably tender, savory and amazing! This is the dish I crave when it is cold outside....pure and unadulterated comfort. By braising the ribs with all of the tasty bits for a long time at a low temp, it makes them so tender and imparts a TON of flavor....and coupled with some pillowy and smooth cheesy grits? FOOD UTOPIA.

Comfort in a bowl...caramelized onions, fall over tender ribs, and cheesy grits made with Cougar Gold...and a divine, herby and beefy pan sauce. ALL THE NOMS!

Comfort in a bowl...caramelized onions, fall over tender ribs, and cheesy grits made with Cougar Gold...and a divine, herby and beefy pan sauce. ALL THE NOMS!


Rainy Day Soup

I love the rain. It makes me want to hibernate and not come out from under a PILE of blankets....unless it's for soup. I also happen to adore soup. It is one of those truly comforting meals for me. It is a hug from the inside out that makes you feel all happy and relaxed, loved and satisfied. I realize there may be a few out there who don't share my love for all things soups and/or stews (babe, I'm looking at you....xoxo), but that will not keep me from professing my adoration for it. The thing about most soups and certainly stews, is that they tend to be best when simmered a long time, which is great if you have the forethought or the time. One of my favorites that doesn't take forever is noodle soup....so many ways to make it amazing. Today, I looked at what I had in my pantry and fridge, and threw together a pretty great bowl of soup for my rainy day lunch.

  • 3 cups chicken broth
  • 1 stalk lemongrass, bruised
  • 1" piece of ginger root, peeled and sliced
  • 1 clove garlic, smashed
  • 1 tsp crushed red pepper
  • 1/2 package rice noodles
  • 2 tbsp soy sauce
  • toppings on hand....I used cilantro, Sriracha, slivered scallion and more Sriracha
  1. Put chicken broth into medium size saucepan and simmer with all ingredients except for toppings and rice noodles for at least 20-25 minutes.
  2. Strain out all the solids from the broth (now infused with ginger, garlic, etc...), and return to saucepan.
  3. Bring to a boil, and add noodles. Allow to boil for a minute then remove from heat and let stand for a couple minutes.
  4. Pour into a big soup bowl and top as you like.....so so so tasty!!!!


Jules's Hashbrown Casserole

Do you like fluffy, creamy, and cheesy potatoes? Perfectly browned smoky sausage? Yeah? Because do I ever have a breakfast casserole for you! The first time I had this dish, my mother in law, Jules, made it for us on a visit to their house. I hadn't ever heard of such a thing, but it was completely brilliant and super easy to make. It also happens to be one of the GirlChild and my Hubster's favorite breakfasts. Now, when Mike and I first started dating, he hated eggs. HATED THEM. This saddened me greatly, as I am of the opinion that eggs are delicious and make most things even tastier....burgers, sandwiches, salads...everything. He has since come around to my way of thinking, and has eggs for or with breakfast every morning, and that includes on top of this little breakfast gem. It will be a great addition to your weekend breakfast menu, with plenty for leftovers the next day!


Easy Peasy Hashbrown Casserole:

  • 1/2 to 3/4 bag of Frozen Shredded Hashbrowns
  • 1 cup sour cream
  • 1 can cream of chicken soup
  • 1.5 cups shredded extra sharp cheddar
  • 1 small onion, grated
  • 1 package ground pork sausage, any variety
  • 2.5 cups milk
  • salt and pepper to taste
  • 2 cups crushed corn flakes (any brand will do)
  • 3 tbsp melted butter
  • 1/4 cup finely chopped chives
  1. Brown sausage and drain. Add to large mixing bowl....preheat oven to 350.
  2. In large bowl with browned sausage, add all other ingredients (aside from corn flakes, chives, and butter) and mix well.
  3. Put mixture into large casserole dish, spread out evenly.
  4. In a small bowl, mix melted butter, crushed corn flakes and chives together. Sprinkle on top of mixture in casserole dish. Into the oven this deliciousness goes for about 60-75 minutes, until golden bubbly brown.
IMG_6676.jpg


We always top with an over easy egg......ALL OF THE YUMMIES!


Chewy Peanut Butter Cookies

Every time I think of peanut butter cookies, I cannot help but think of my late Grandpa Fred...sitting with him on the tailgate of his pickup or even at the yellow and worn counter at home, just eating cookies we dunked in his coffee. We grew up living with my grandparents and mom, aunts and some cousins. NINE people in a 5 bedroom home with ONE bathroom. Yep. My grandparents were retired and hung out with us most days, and through hanging out with Grandpa we gained an appreciation for simple things, like going up into the Entiat Valley to cut firewood for the winter. When we would all head up into the mountains, there were always thermoses full of coffee and hot cocoa, coolers filled with ham sandwiches on Poulsbo bread, and Archway cookies. Peanut Butter, Oatmeal with Raisin, and sugar. But I remember Grandpa sitting on the tailgate of his old white Ford, cup of coffee in one hand and a peanut butter cookie in the other, dunking it into the coffee and taking a bite, looking around at the grandkids as we horsed around, chasing each other with big carpenter ants we found in the felled logs, every now and then chatting with Uncle Randy about what the best way to load the bed of the truck with firewood would be. Those trips up the Mad River with my family are some of the fondest of my childhood and it instilled in me a love of nature.......and peanut butter cookies.


Now, you can no longer find Archway cookies as readily as you used to be able to (Buttrey's, anyone?), so I make due with making chewy and peanut buttery cookies of my own at home. There are many different ways to have them....with chocolate, crispy and buttery, thick and chewy, with a sugar crust or not, fork marks or just drop cookies. I like mine chewy and almost like peanut butter fudge in the middle....chewy and ooey gooey and bursting with peanut buttery goodness.

This recipe will make around 2 dozen, depending on cookie size, and I used my Kitchen-Aid mixer, since the batter is so thick.

PB Cookie Pertinents:

  • 1/2 Cup Butter, softened

  • 1 cup peanut butter (I used creamy)

  • 1/2 cup white sugar

  • 1/2 cup brown sugar, packed

  • 1 egg

  • 1/2 tsp vanilla extract

  • 1 tsp baking soda

  •  1/4 tsp salt

  • 1 3/4 cups AP flour


PB Cookie Procedurals:

Preheat your oven to 350. In a large bowl, mix your dry ingredients (flour, baking soda, and salt).

In mixer bowl, cream together butter and peanut butter with the sugars. Once fully combined, add egg and vanilla extract.

Begin to add in dry ingredients, 1/2 cup at a time, until just incorporated.

Once wet and dry ingredients are combined, roll into 1" balls and I like to put hash marks on mine with a fork, just like Archway used to.

Bake at 350 for 7 minutes (or less! you want a blinde cookie, not golden....more blonde=softer and chewier).

Allow to cool thoroughly and store in an airtight container. If there's any left!


Carby Delights

Oh bread.....I could write a love song for you....about you....you are SO not good for me, but I kinda like it, and cannot help myself. I remember when I was very young (my Grandma Peggy was still alive and kicking), at dinner every night there was a sleeve of saltine crackers and softened butter alongside the homemade 1,000 Island, and we would all nibble on that until dinner was ready. Then when dinner came out, we would almost always have a plate of simple white bread with softened butter. We loved our veggies, but we also LOVED our carby carbs. When we got our first microwave, us kids darn near ate a whole loaf my ourselves just balling the slices up around butter and jam and nuking them until it was soft and melty. We were in heaven....

I have always admired people who can bake bread from scratch, yet I have always been intimidated by yeast based dough and rolls. It always seemed such a process and so tedious and so easy to screw up that I never attempted it myself.....so I buy them instead. But since I know for a fact that homemade cinnamon rolls, garlic knots and crusty rustic beautiful loaves of herby garlicky bread just taste better, I thought I would give it a try finally.

I bought my flour and little packets of yeast and came home sooooo excited at the possibilities.....I would make my little family some homemade cinnamon rolls to start out. I got a great recipe (thanks, mom!), and though I was nervous about how they would turn out, I gave it a go.....and to my surprise, it wasn't that hard! Every time you make something for the first time, you expect a little variance from the "trained professional" who wrote your recipe....but sometimes they turn out a total fright. But it is also a learning experience.....an opportunity to correct whatever you think went wrong last time, and get it closer to perfection. So. That being said, there are things I will do differently next time I make them, but they were totally tasty just how they were. I'm thinking a caramel pecan glaze next time.....


Cinnamon Rolls....my first try!

Cinnamon Rolls....my first try!

On Christmas, when we have the kiddos, we always try to have the hubsters parents over for opening gifts and having wine and dinner....my in-laws are an absolutely wonderful couple of human beans. They are loving and fun, so much fun to have close to us, though I do miss my parents as well. This year, we had them over for dinner to celebrate on Christmas Eve.....and since my father in-law and I share a favorite meal (pasta with meat sauce), I though I would do a lasagna with my homemade meat sauce and try my hand at garlic rolls. Again, success! It really wasn't that difficult, and the inlaws were impressed...kids thought it was awesome, I feel like I am finally figuring it out!


Garlic rolls....so yummy!

Garlic rolls....so yummy!

And then there's the matter of a really good crusty and herby garlic bread. As you all know by now, I love everything bread, and have long admired those with the skills and patience to craft beautifully crusty, artisan style rustic loaves of deliciousness. Easiest carby delight ever (recipe below) ....I baked it up in my cast iron skillet, which provided it a nice crust on the bottom as well as the top, and it is a no knead dough, so it is really (by bread standards) an easy one to make. You can certainly put whatever herbs you have on hand in to the dough (I used rosemary....and roasted garlic.....amazing!), and it would be super tasty. The only thing better than a warm and fresh from the oven loaf of bread is being able to make it at home!

Nada Knead Bread:

  • 1 package active dry yeast

  • pinch of sugar (about 1/8 tsp)

  • 2 cups lukewarm water

  • 1/2 Tbsp sea salt

  • 4 1/3 cups AP flour

  • Olive oil

  • Herbs of choice, I used rosemary and roasted garlic as my add ins

Combine sugar and warm water in a large bowl (I used my Kitchen-Aid mixer bowl), and add in yeast. Give it a stir and let the yeast bloom a bit. Combine dry ingredients in separate bowl.

*This is where I add my herbs/roasted garlic into the bread dough* Using the dough hook attachment on my Kitchen-Aid (or wooden spoon), I added to the yeast and water mixture 1 cup of dry mixture at a time, until completely incorporated.

Coat the ball of dough with a light coat of olive oil, cover with plastic wrap and a tea towel and allow to rest for 1 hour.

Resist the urge to punch the dough down. RESIST.

Lightly oil a cast iron skillet, and sprinkle a good amount of flour on top of dough. Cover hands in flour as well and shape dough into a disc, as best you can. (Dough will be super sticky!)

Place dough disc in skillet, cover loosely with tea towel and let rest for another 30 minutes, while preheating your oven at 400 degrees.

Drizzle a little more oil onto top of loaf, and add a sprinkle of herbs and sea salt on top.

Bake at 400 for 35-40 minutes, or until the loaf is a deep golden brown.

Slice it up, slather in buttuh and enjoy!!

Gumbo Thangs

It's that time of year. The grey and slushy and gross and dirty and COLD time of year. The beauty of Old Man Winter is wearing thin, and all of the winter white is starting to melt away just a little bit....just enough to make it uuuuuuugly out. And when this time of year rolls around, all I want to do is make soup. Soup gets a bad rap from the #haters of being a boring meal option, or "old person" food...but it can actually be a big bowl of comfort when the weather outside is frightful. Many cultures around the word have fantastic soups or stews that, when you eat it, you completely identify it with that particular culture. There's phò from Vietnam, Posolé from Mexico, Minestrone from Italy, and on and on the list goes....even regions of the US have their own soups and stews, including Louisiana.

On my bucket travel list, is New Orleans. It seems to be such a delicious melting pot....French, Creole, Spanish, and African roots meld with local ingredients like crawfish, oysters, and shrimp into amazing delectables such as po' boy sandos, jambalaya, and gumbo. Gumbo. I love a good bowl of gumbo (as I do all things soup/stew)....I think I would love it with seafood, but since my hubster is against all things seafood, I usually roll with chicken and Andouille.....it's suuuuper tasty. I love the creaminess of the roux-based broth and the spiciness from the blackening spices in the Andouille.

Andouille Sausage all seared up and delicious!

Andouille Sausage all seared up and delicious!

The roux is central and of the utmost importance when making a good gumbo. It is a mixture of flour and butter/fat, that is cooked down and stirred often over a medium heat, until it reaches a deep dark brown. It is the base for the whole dish. Es muy importante!.......so make sure that you can take the time to love it the way you should...it is worth it in the end!

The Holy Trinity is the base for most French Creole stews and dishes, and consists of bell pepper, celery, and onion. I also put in garlic, because HELLO it's garlic.

!Behold the Holy Trinity.

!Behold the Holy Trinity.

Gumbo Thangs:

  • 4 cloves garlic (more or less, depending on personal taste), minced fine

  • half of 1 white onion, small dice

  • 1 small green bell pepper, small dice

  • 1 large stalk of celery, small dice

  • package of good Andouille sausage

  • 1 lb boneless skinless chicken thighs

  • 1/4 cup of butter

  • 1/4 cup + 2 tbsp flour

  • chicken stock, about 6 cups

  • Rice of choice, I use plain white rice

  • 2 bay leaves

  • 2 tbsp blackening seasoning

  • salt and pepper to taste

First, get a large wide pot nice and hot for searing the sausage off. Add sausage to pan and cook, stirring often to avoid too much sear (AKA burn). Once it is all seared off, remove from pot and set aside on a plate. 

Season chicken thighs with salt and pepper, and cook in pot with renderings from sausage for 5-10 minutes on each side over medium-high heat, or as long as it takes to cook them just through, depending on size. Once cooked through, remove from pot and set aside.

In same pot, add about 2 tbsp of EVOO and bring up temp to medium. Add all your veg, except for garlic. Cook veggies just through (until onions are transparent) and add garlic. Cook for another couple minutes to take the raw taste off of the garlic. Remove from pot.

Put par cooked veggies, the sausage and chicken into refrigerator to completely cool...just because it takes awhile to get the roux perfect, and we don't want them to sit out on the counter the whole time at room temperature.

Add half a stick of buttuh into the same pot and melt down, then add all of the flour in and stir to incorporate them together. Continue to stir mixture every few minutes. Now....this step of making the roux is CRUCIAL to the right flavors and broth texture to develop in your gumbo. It took this batch around 65-70 minutes to toast it down and get it a nice and dark rich brown.

Once you've reached this medium to dark brown stage, you can add in the bay leaves, blackening seasoning, veggies and sausage, and all of the chicken stock. bring to a boil, then reduce heat and simmer for at least an hour.

Cook rice according to package instructions, and rough chop chicken thighs, and add to gumbo. Continue to simmer for another 30 minutes to heat chicken all the way through.

Serve in a bowl with rice.....I like to top with sliced scallions, and a splash of Louisiana style hot sauce, such as Tabasco........and enjoy!


#saladporn

As are many of you, I am trying really hard to focus on making consistently better decisions in the New Year....go to the gym at least 4 days a week, eat more salads than burgers (SOB!!), drink enough water, and on and on the list goes of GROWN UP decisions that have to be made to be healthier. Live longer. Increased quality of life and such.

.........aaaaand so. Salads. Some people often think of salads, and instantly feel depression. Like "salad" equates to "flavorless and unsatisfying sadness in a bowl".......but I am here to VOW to you all that this healthier choices nonsense shall not, and WILL NOT be unsatisfying nor will it be flavorless........or sad. I am going to make so many flavorful and satisfying salads, that are worthy of "ooooh" and "aaahhhh" AND "yum". Hence the #saladporn title of this post, and the many more worthy salads to come. And so here we go!

Salad Pertinents: 

  • Red beets-4, cleaned VERY well. Peel and quarter, reserving skins and roots
  • 1 medium sweet potato, cleaned and peeled. Cut into 1" pieces.
  • 1/4 cup of walnuts, toasted lightly in a dry pan (give the pan a good shake every couple minutes, so they do not burn) over med-low heat. Done before they get color, usually when you can smell them.
  • Goat cheese of choice
  • Chicken breast cutlets, oven roasted with poultry seasoning (see post on Mason and Mom Night for recipe). Set aside to slice later for salad.
  • Anjou (I used red, grown in Cashmere!) pear, cleaned and thinly sliced.
  • Greens of choice.

Beets can be a polarizing thing....they generally are things that make people think of their grandmas and gardens and yuck....they are DEFINITELY a "love 'em or leave 'em kind of thing. But beets are beautiful. In their color, in their earthy flavor, and they get a nice background sweetness when roasted. I love them in all their roasted, slightly sweet glory in a salad....not just any salad, but one with gracefully juxtaposed parts that contribute to a harmonious bite every time. Goat cheese...salty and creamy goodness....perfection for balancing out the sweetness of roasted beets and sweet potatoes....walnuts (since I have a whole bag.....thanks, Dad!), toasted and left alone in their loveliness,...crisp red anjou pears (seasonal and local), and delicious and savory herb roasted chicken. It sounds good, right? Not just "good for a salad"....like, really GOOD. 

Then there is the vinaigrette. Good GAWD. It is a vinaigrette made from the beet trimmings, vinegar, EVOO, a pinch of sea salt, and sugar. (See recipe below) This is a perfect dressing for the salad, as it has tanginess and sweetness from the sugar and apple cider vinegar, and the earthy quality from the beet trimmings. It is the perfect finishing note atop this salad, and is so so totally balanced and satisfying. So, watch for more #saladporn posts coming soon, and try this at home.....you won't be disappointed! All the goodness of a restaurant salad, with no need to get gussied up, because we can make that #saladporn together!

Beet Juice Vinaigrette:

  • Trimmings from 4 red beets-skin peelings and roots...can even use CLEAN stems. 
  • 1/2 cup white granulated sugar (can use honey, will need to adjust amount for desired sweetness)
  • 1 cup Apple Cider Vinegar
  • 1/2 cup water
  • pinch sea salt
  • EVOO

Mix all ingredients minus EVOO in saucepan and simmer for about 20 minutes.

Remove from heat and let cool, then strain beet trimmings out, and pour into Mason jar.

Into Mason jar, add EVOO, replace lid tightly, and shake until dressing is emulsified. 

Toss together with greens of choice (I used Romaine and baby Kale)....use a tbsp of the dressing at a time and go from there. *Remember! You can always add more dressing, you cannot take it out.* 

Top with crumbled goat cheese and toasted walnuts, roasted and diced beets and sweet potatoes. and thinly sliced red anjou pears. Add thinly sliced herb roasted chicken breast, and GRUB OUT!

Buttermilk Biscuits and Sausage Gravy

A little background on me and biscuits. I have tried and failed at making them, so many times. I have tried the simplest recipes out there on Pinterest, and failed. They always turn out hard and with none of the flaky layers the recipes promised. I DREAMED of "whipping up" a batch of fluffy and buttery biscuits....the kind you find in random hipster restaurants (because they don't generally cut corners, and believe everything should be artisanal or homemade), the kind that are pillowy soft and make the whole house smell amazing........but I had resigned myself to a life of canned biscuits...and despite all of my other kitchen wins, one of the simplest things to make is the one thing I can't. *sigh*......

..........until today. I wanted to make biscuits and gravy for breakfast on Sunday....it's a family favorite, and easy enough to get together....but what about the biscuits? I suppose I could just let the Doughboy do the work for me.....he does solid enough work. But I put a lot of love into my gravy....so why not just TRY to make them from scratch? Could this be the time I succeed?? How long have I wanted homemade biscuits and never given them another try? Enough is enough. I didn't even buy a can of biscuits as backup. I dusted off my Betty Crocker cookbook and got to it. Cutting the cold butter into the sifted flour, salt, sugar, and baking powder....trying so hard to not touch the dough as it was forming, for fear I may melt the buttuh. Rolling them out, ever so gently....so as to not overwork the dough....layering and re-rolling it gently......

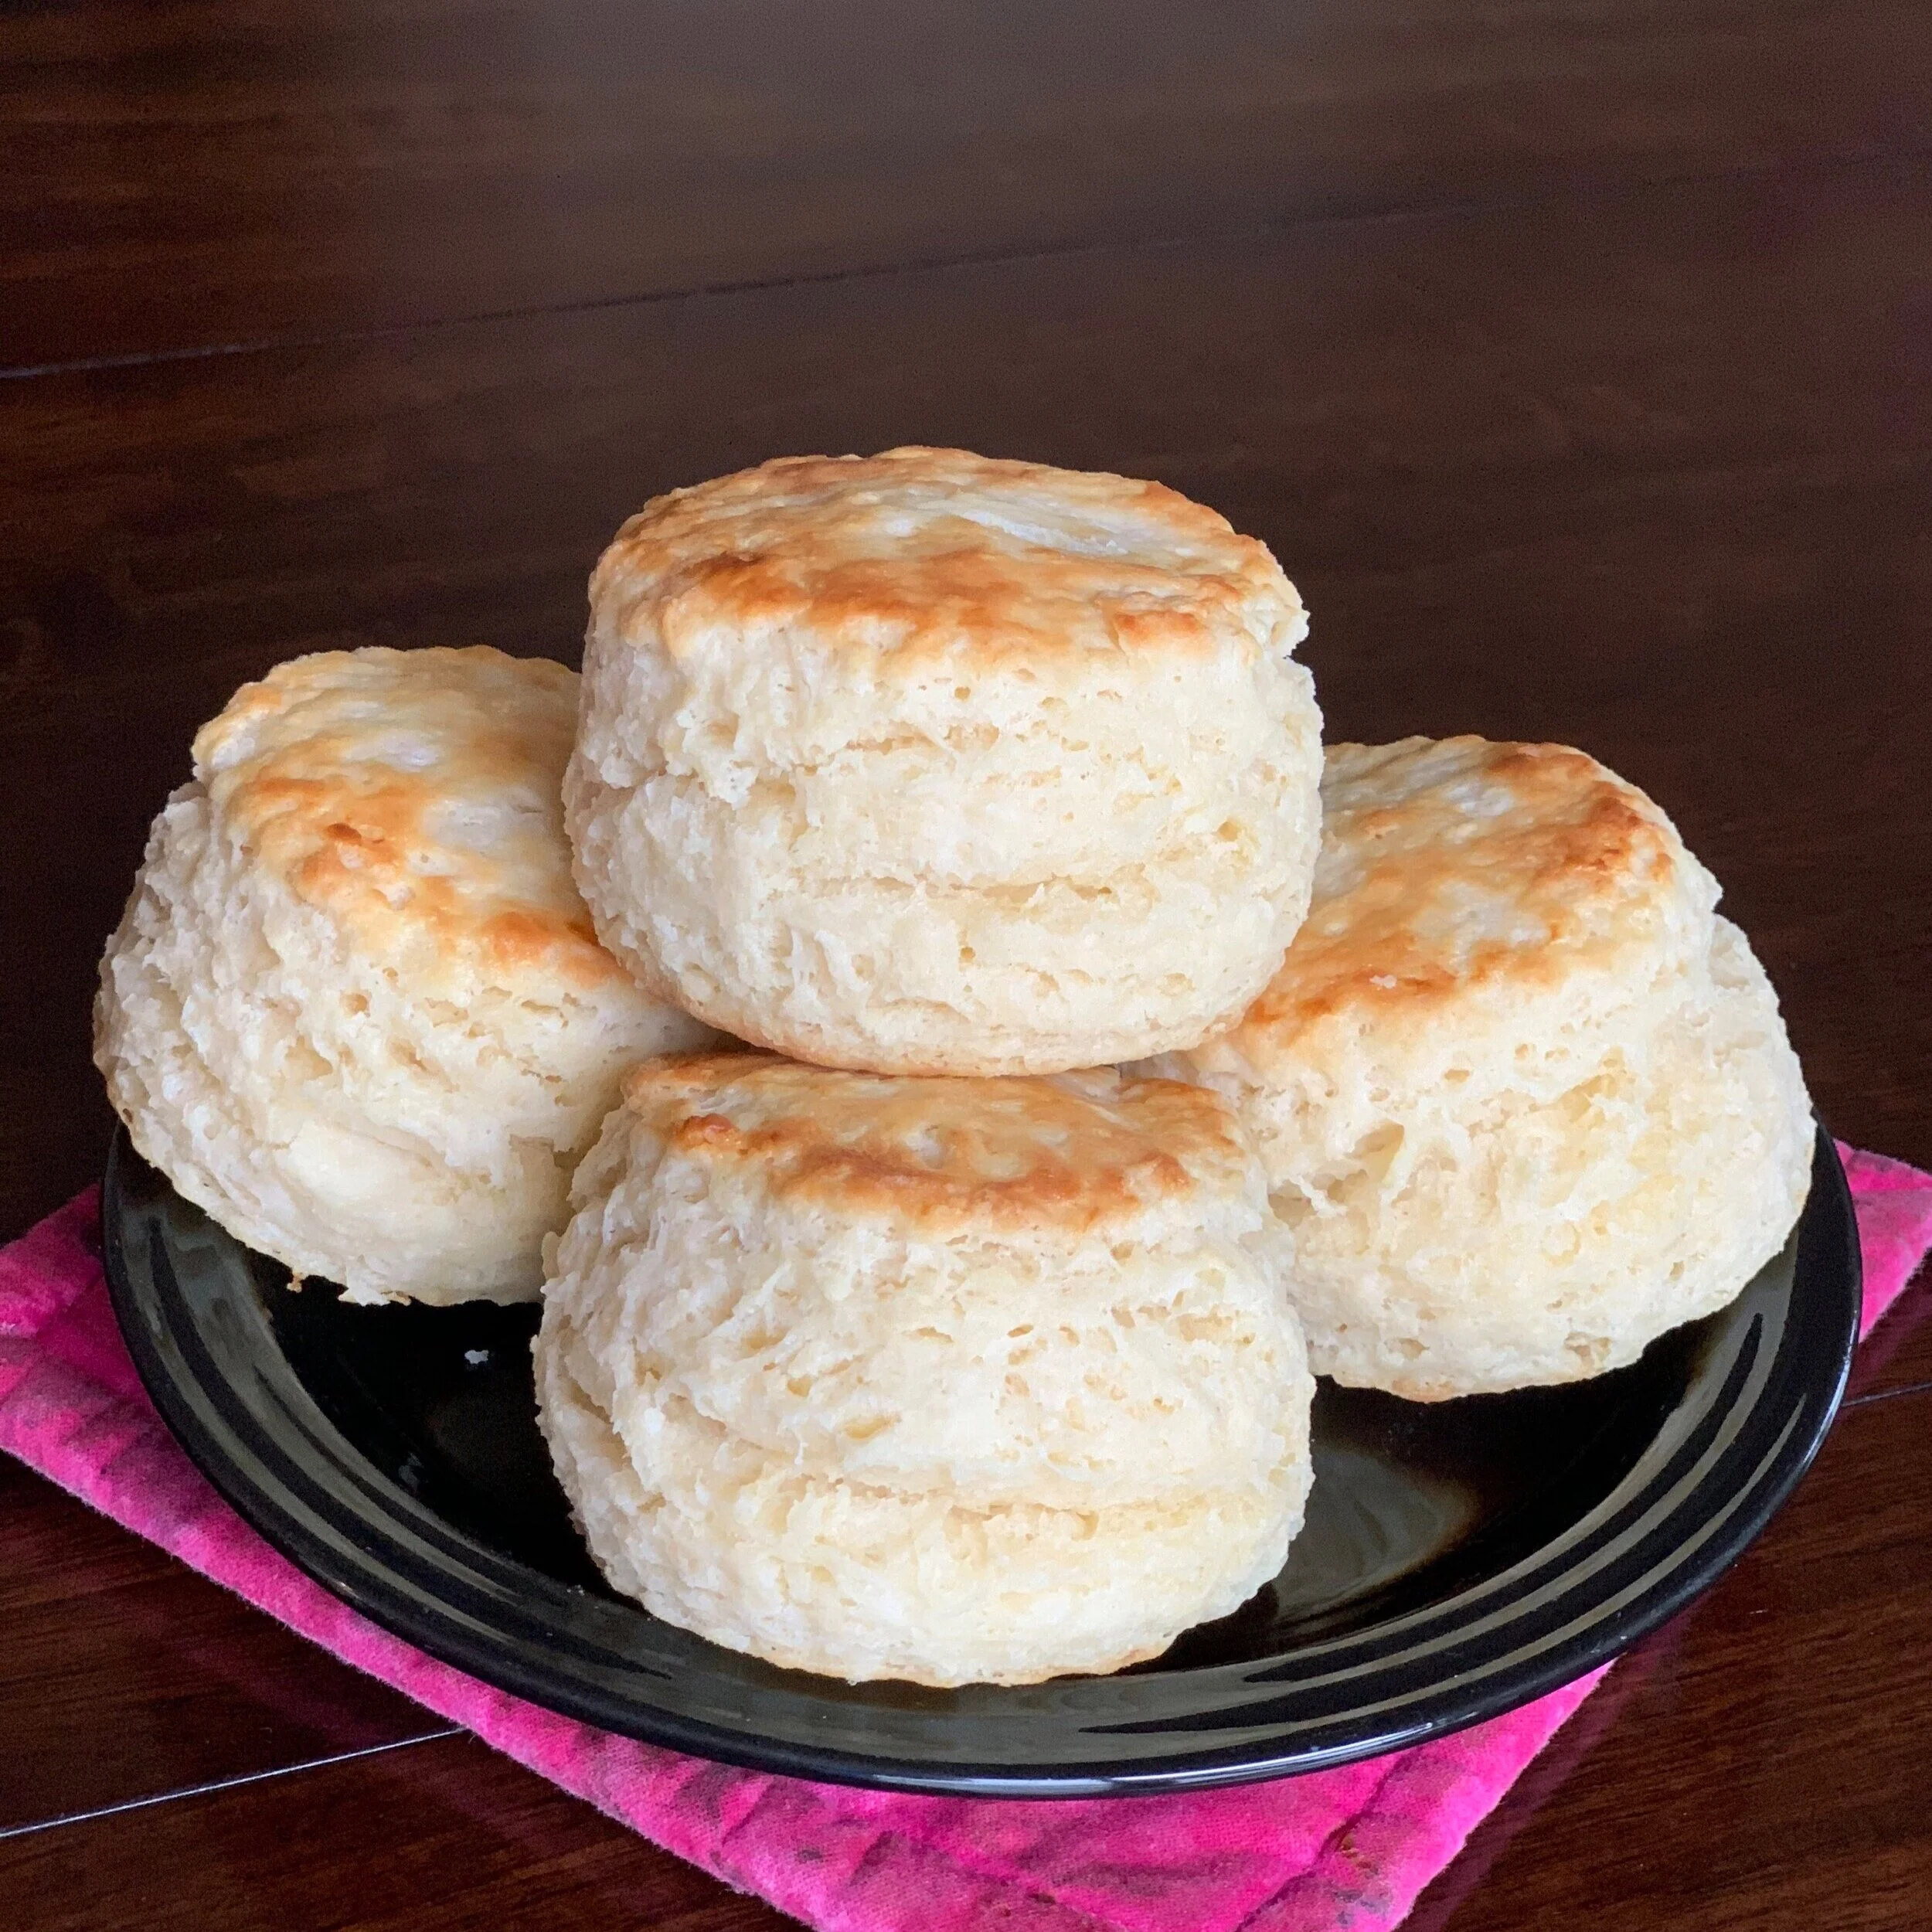
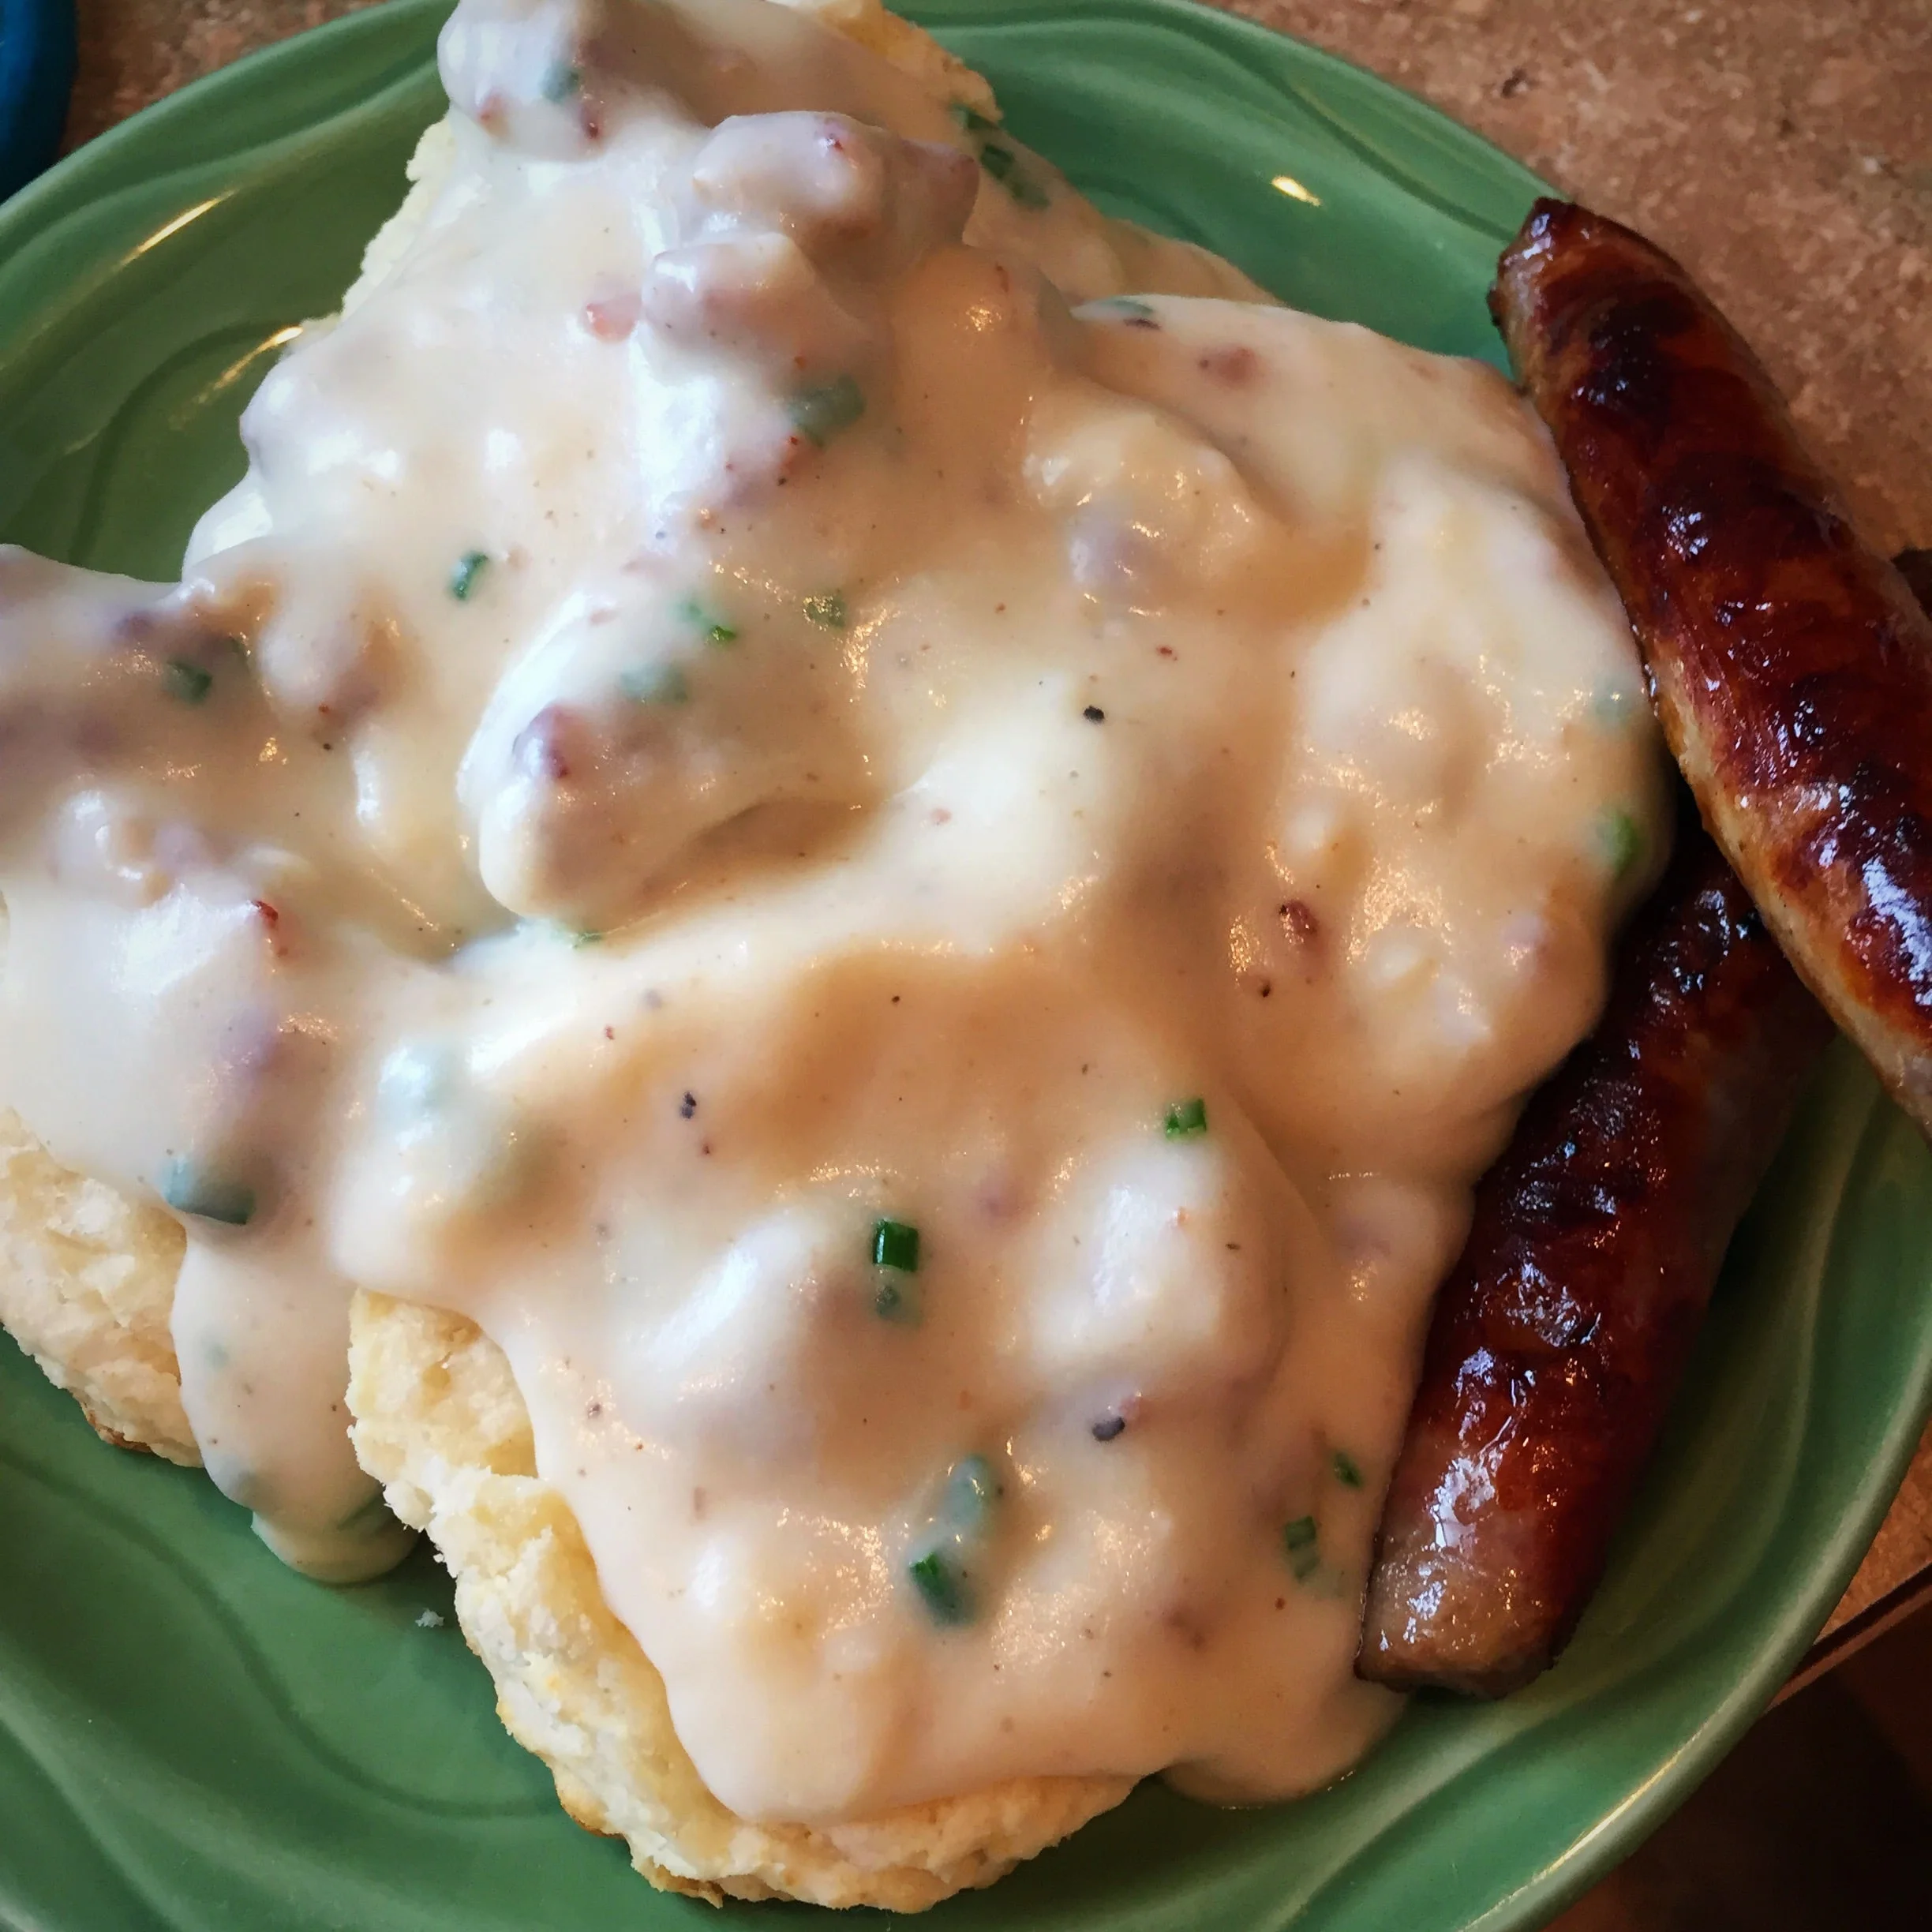
And they turned out pretty close to perfect! I was certain they wouldn't turn out well, and I put a bit more buttermilk in mine than Betty does, but other than that, it was a solid recipe! They rose up, nice and high. They were buttery and flaky....and held up to the beautiful sausage gravy perfectly. For it being something that has caused me actual anxiety, I can't wait to try them again! Practice makes perfect!


Buttermilk Biscuits

  • 2 cups flour
  • 1.5 tbsp Baking Powder (make sure it isn't expired...it loses it's leavening power if it gets too old)
  • 1 tbsp sugar
  • 1 tsp salt
  • 1/2 cup butter, COLD
  • 1 cup buttermilk (adjusted to the amount I put in)

Sift all the dry ingredients into large bowl, quickly cube up butter and start working it into the dry mix with a pastry cutter. Use care to not handle the butter with your hands too much, as you want the butter to work into the dry mix, not melt into the dry mix. The butter pieces in the dough are what give you the little air pockets in your biscuits that give you the fluffy and flaky quality in you finished biscuit.

Once butter is cut into the dry mix (you are looking for pea sized pieces of butter), add the buttermilk all at once, and mix together with a spoon. When dough is formed into a ball, turn out onto lightly floured clean counter and begin to roll it out....gently as to not overwork the dough.

Now.....Preheat oven to 425. Cut dough into third rectangles and layer them one on to of the other, and quickly and lightly roll again. Repeat cutting and layering process once more, and this time, just use rolling pin to roll over it once. Cut yo biscuits y'all. I used a biscuit cutter about 1 3/4" in diameter.....and through repeating the cutting, layering and rolling a couple more times, I was able to get 8 biscuits from this size batch.

I brushed the tops with melted buttuh, and baked in the preheated oven at 425 for 10 minutes, but ovens vary, so i would check them at 8 minutes, just in case.

Boom. That is it. I had no idea that they could be made that way at home...and I am so glad I was wrong. This morning, I smothered them in homemade sausage gravy, but I would wager they would be pretty great with just some tasty raspberry jam too.

Good Gawd Gravy:

  • 1 package of pork country sausage, bulk
  • 2-2.5 cups milk
  • 1/4 tsp onion powder
  • 1/2 cup flour
  • chives, chopped small
  • salt and pepper to taste

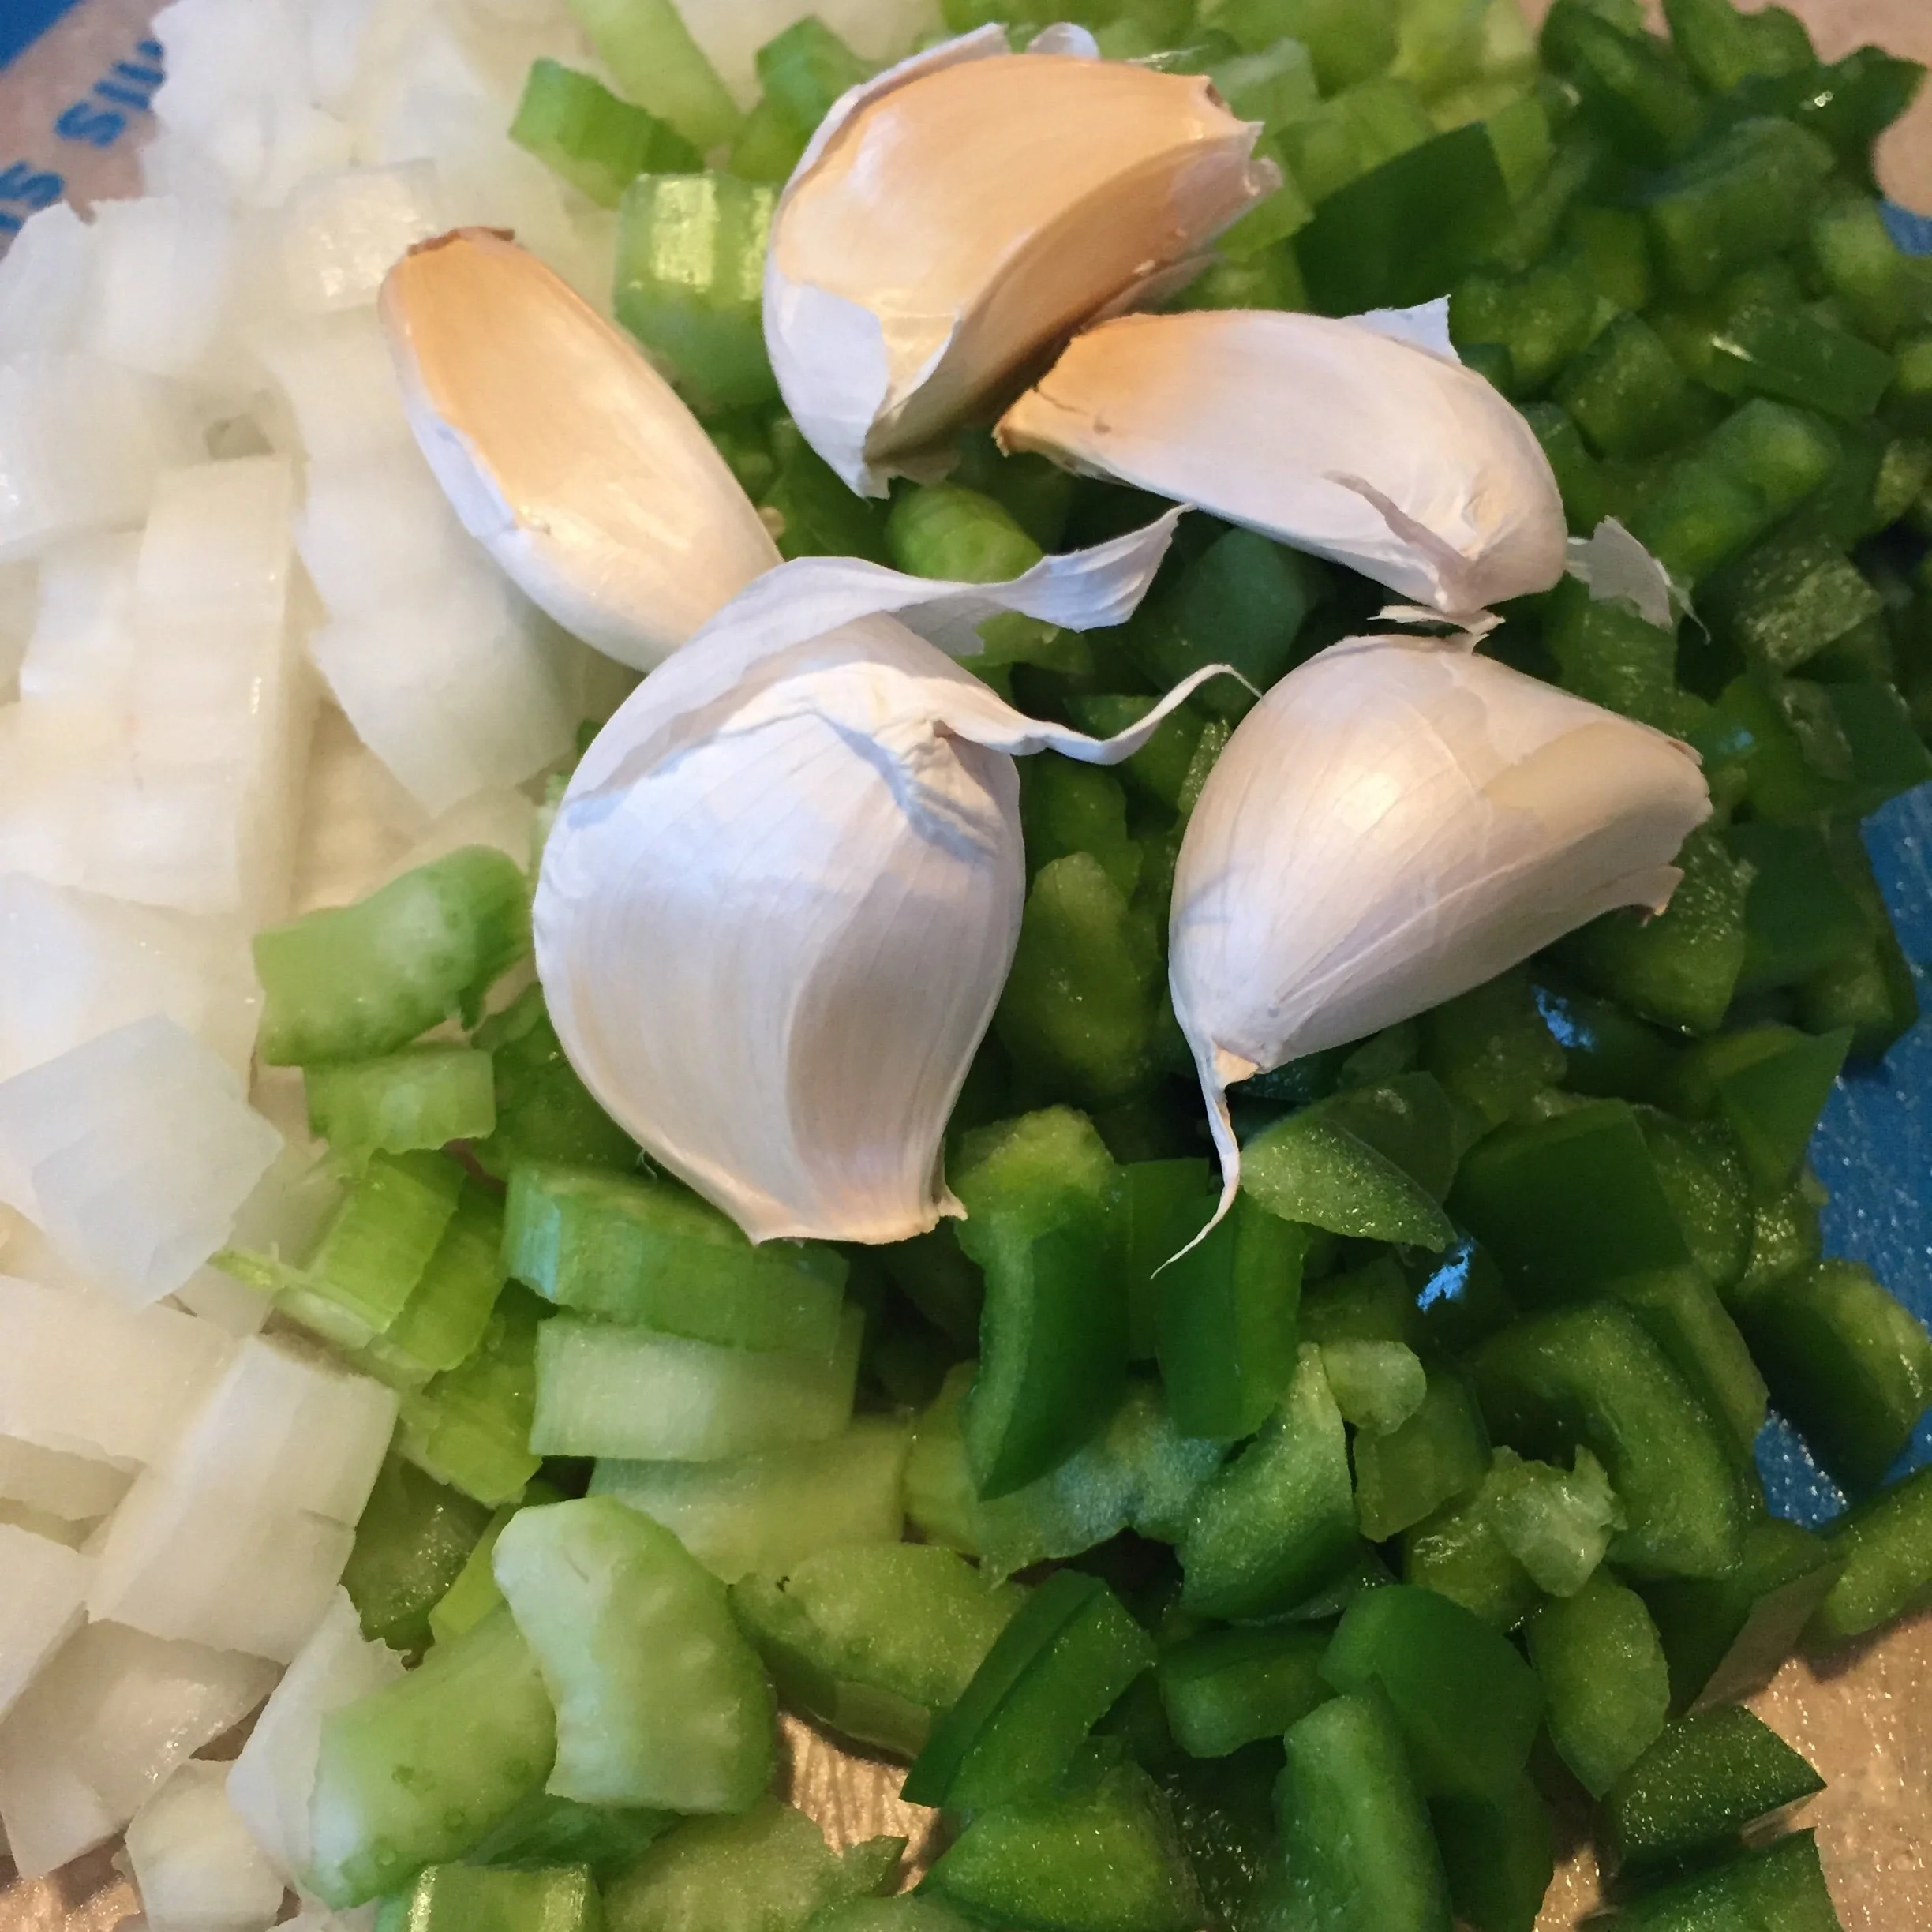
Brown sausage in a saute pan. Once all sausage is browned off, and flour to pan and stir to coat the sausage with it. (I always add a pinch of salt and some turns of black pepper from our pepper mill at this step....always season at every step!)

Cook flour and sausage mixture over medium high heat to get the raw flour taste out a little....about 10-15 minutes, stirring regularly.

Add 1 cup of milk and onion powder, and stir constantly so you don't get lumps in your gravy. It will thicken up on you quickly, so once you feel it start to thicken up, add another cup of milk and continue stirring.

If mixture is still too thick, I add the last 1/2 cup of milk. *IF GRAVY IS STILL TO THICK, ADD 1/4 CUP AT A TIME OF MILK, TO THIN IT) When it is the desired consistency, reduce heat and add salt and pepper to taste, and chives.

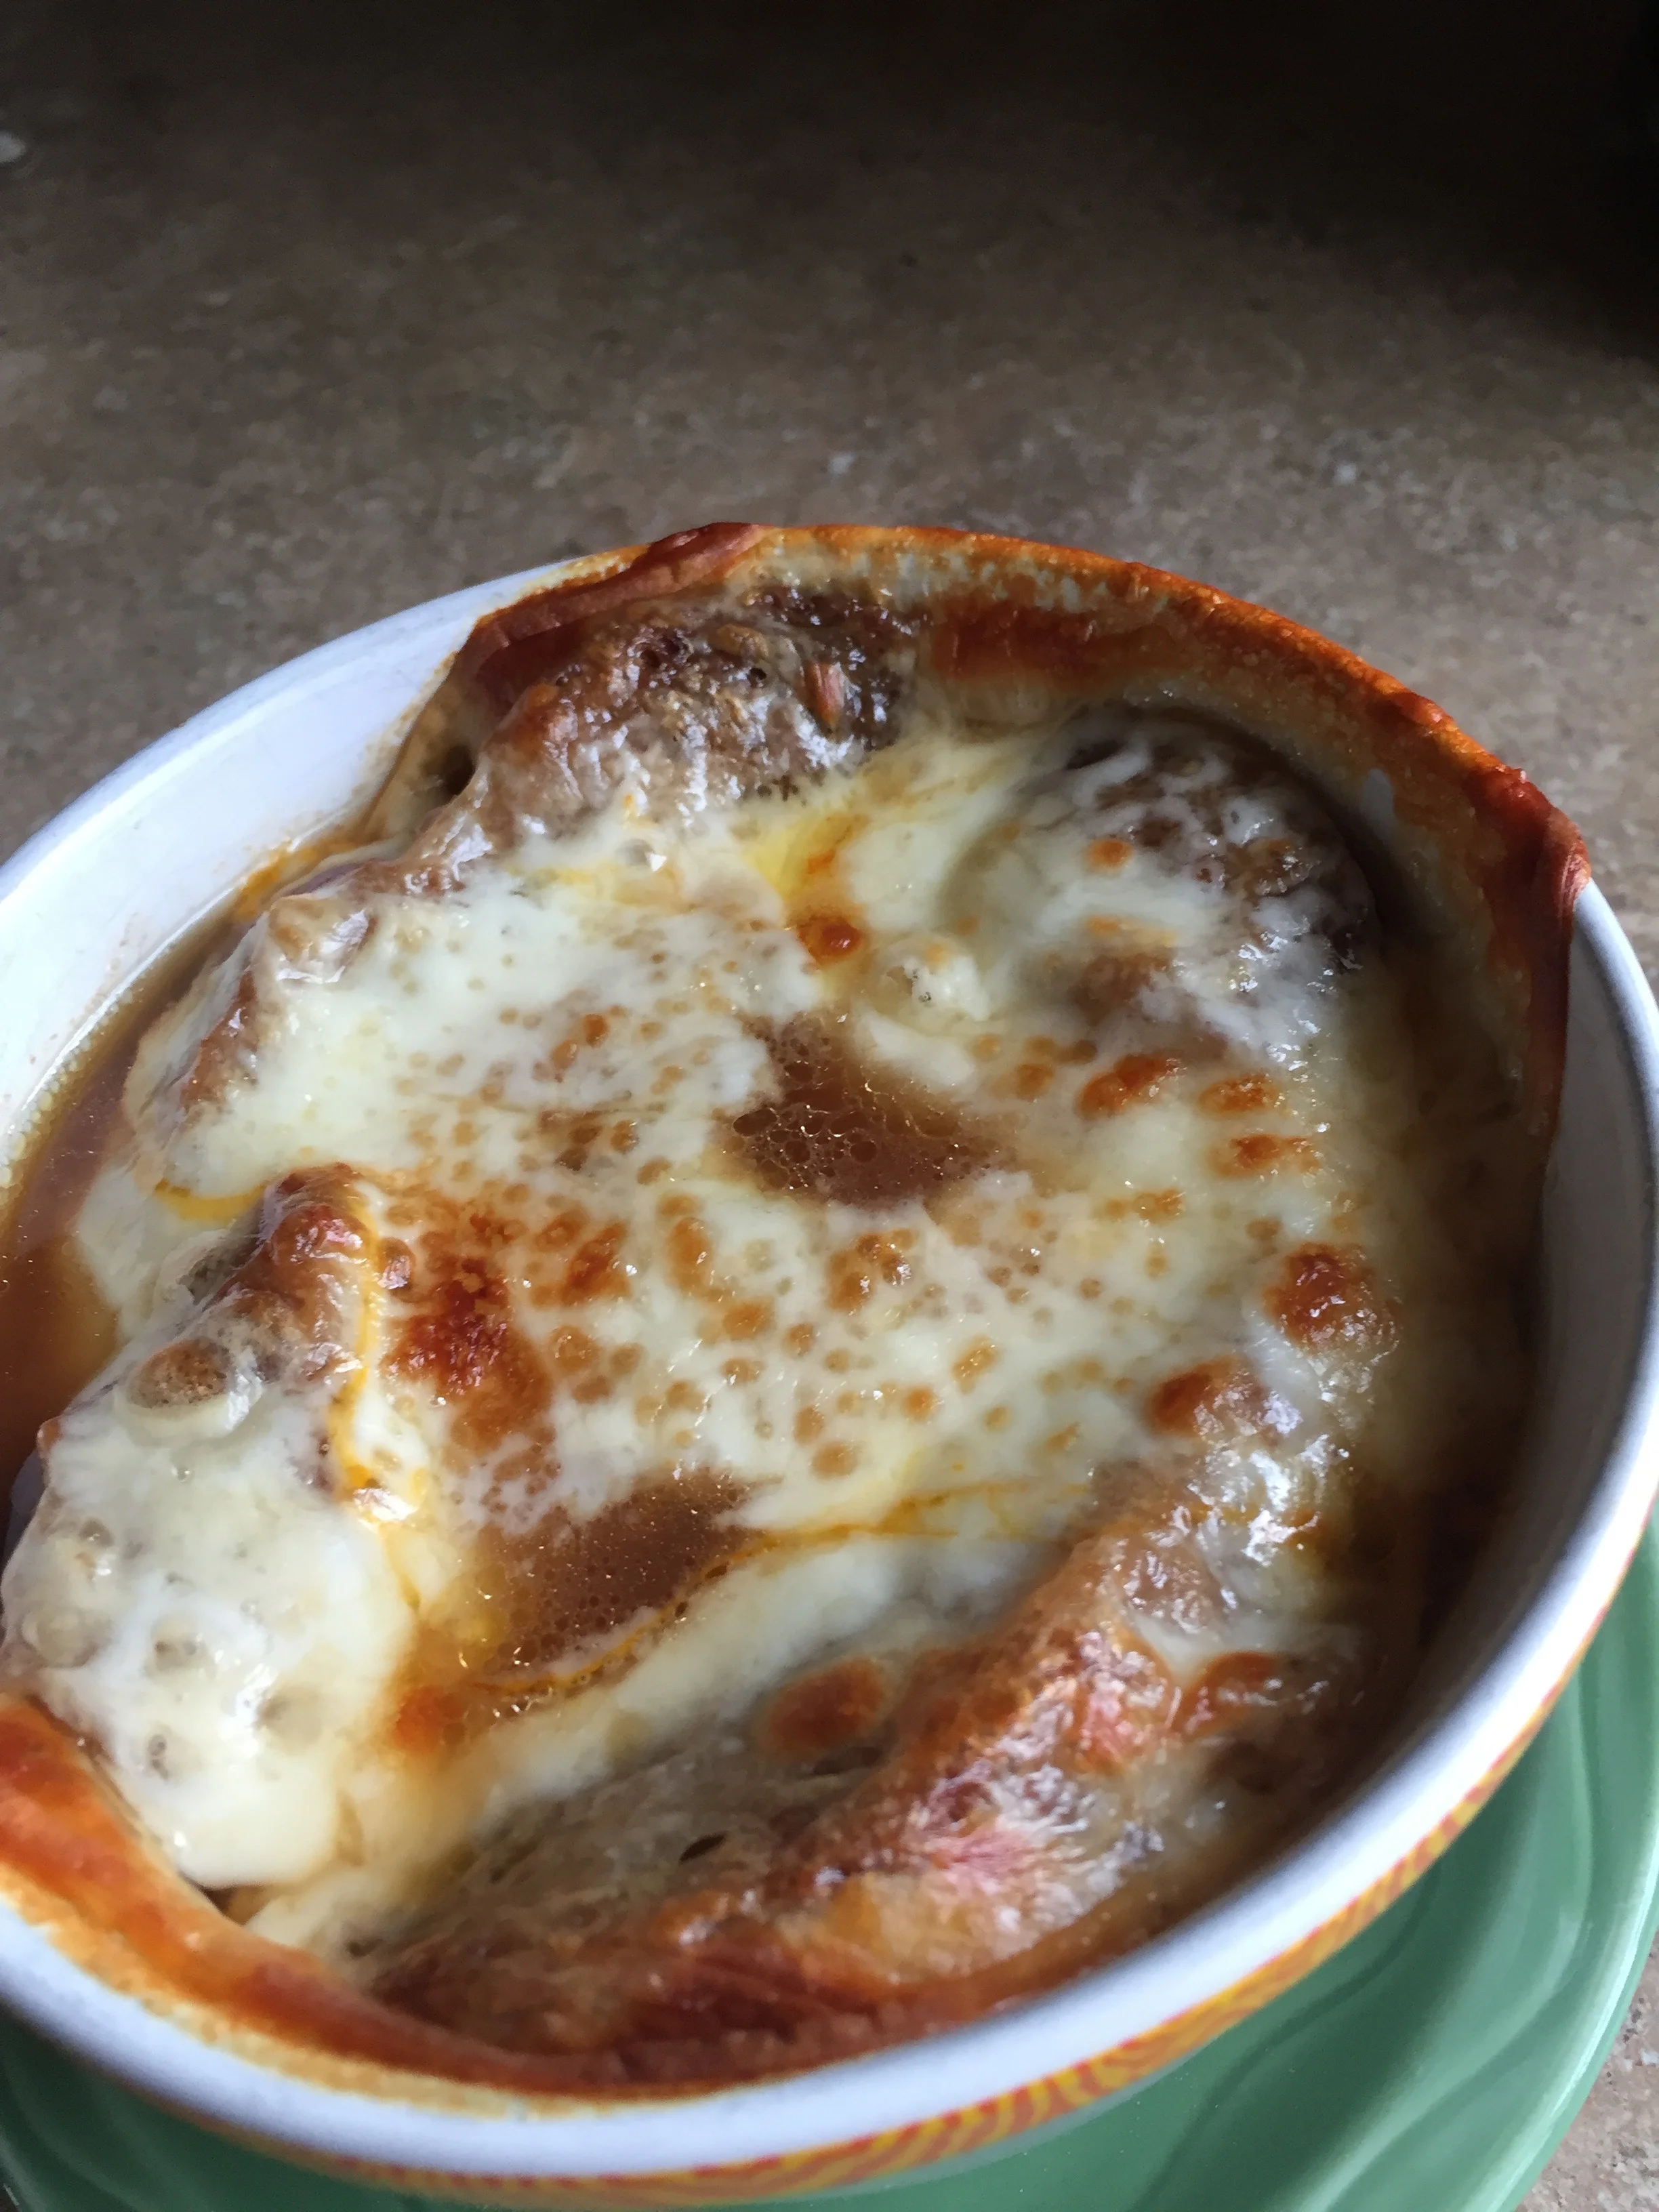
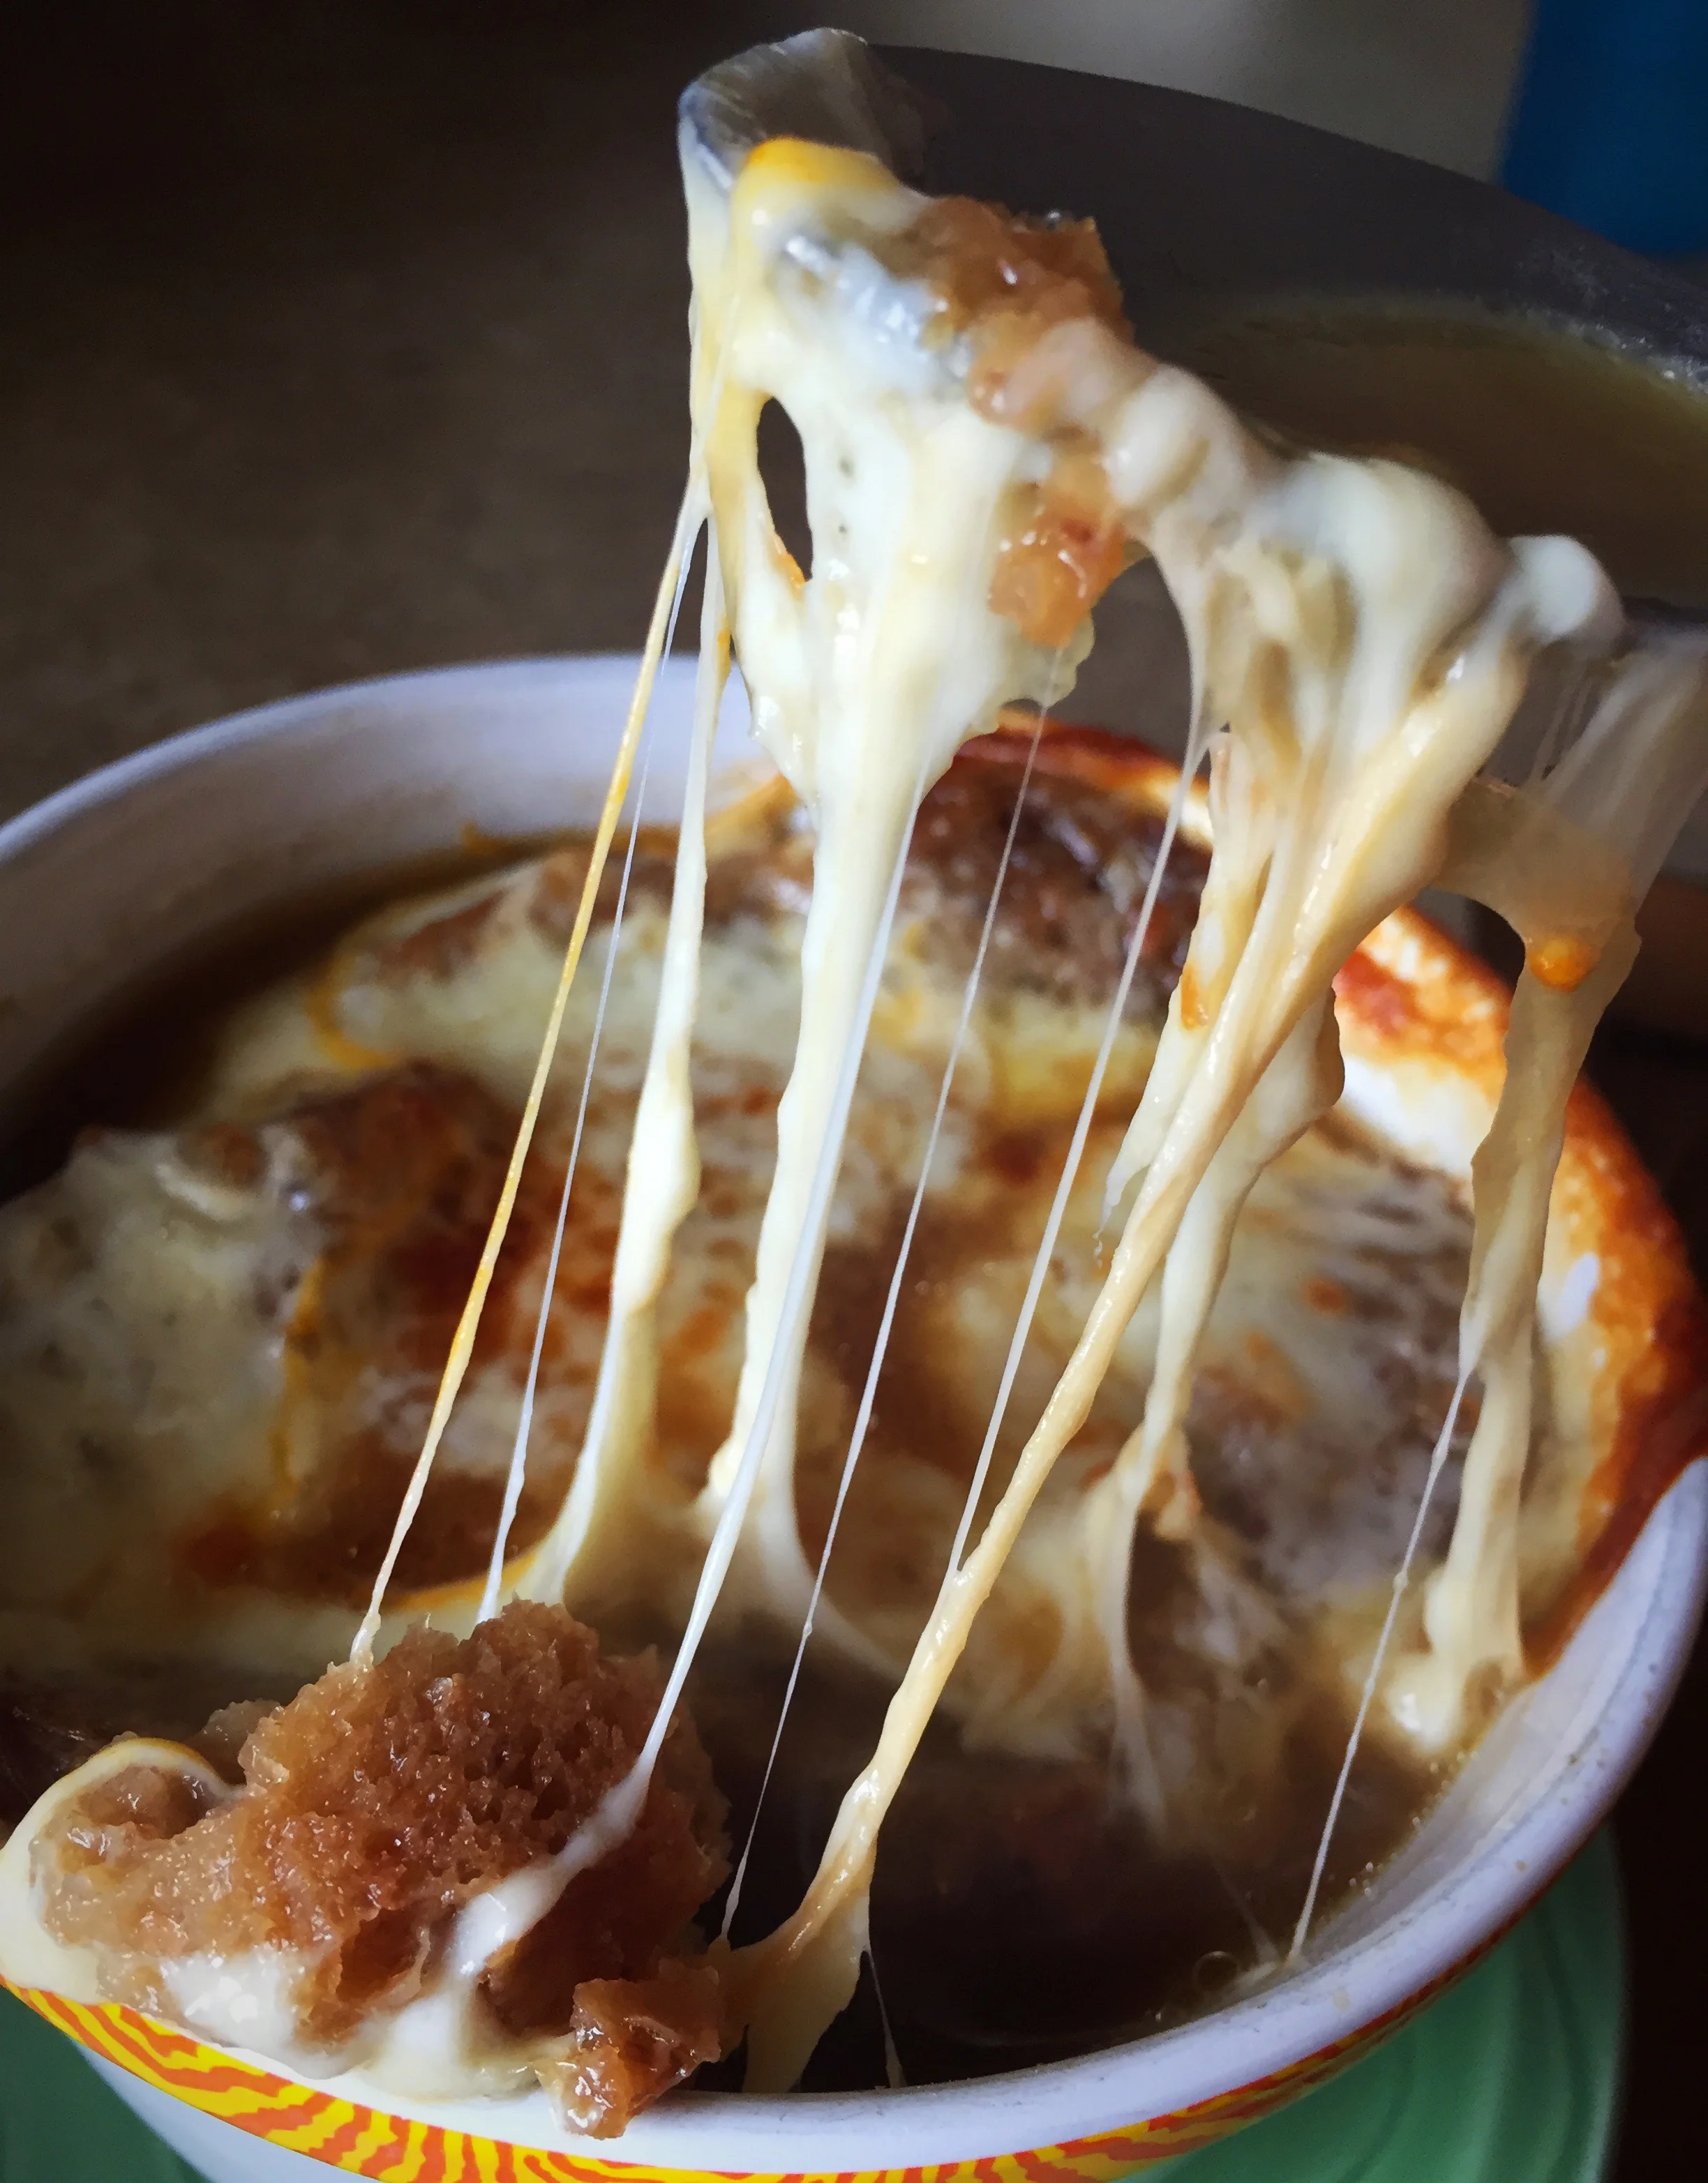
Split the biscuits....pour on the gravy.....and dig in!


Finished product was super yummy!!!